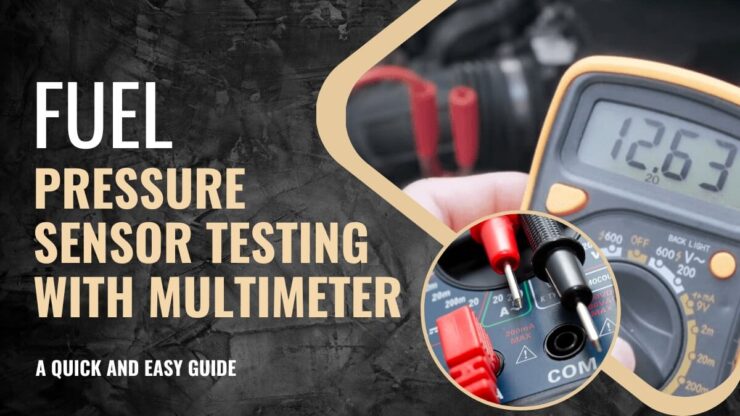
A fuel pressure sensor is an important component of any fuel injection system. It is responsible for monitoring the fuel pressure within the system and transmitting this data to the engine control module (ECM) or powertrain control module (PCM). If the fuel pressure sensor is not working properly, it can cause a variety of problems, including rough idling, stalling, and poor fuel economy. In this article, we will discuss how to test a fuel pressure sensor with a multimeter.
What Is a Fuel Tank Pressure Sensor?
A fuel tank pressure sensor is a device that measures the pressure inside the fuel tank of a vehicle. It is typically located on the top or side of the fuel tank and is connected to the vehicle’s fuel system via a hose.
The sensor works by measuring the pressure inside the fuel tank and converting that pressure into an electrical signal, which is then sent to the vehicle’s engine control module (ECM). The ECM uses this information to determine the proper amount of fuel to deliver to the engine, ensuring that the vehicle runs efficiently and effectively.
How Does It Work?
A fuel tank pressure sensor works by utilizing a pressure-sensitive element, such as a diaphragm or strain gauge, to measure the pressure inside the fuel tank. As the pressure inside the tank changes, the sensor detects those changes and sends a signal to the ECM.
The signal sent to the ECM is typically a voltage signal, with the voltage changing in relation to the pressure inside the fuel tank. The ECM then uses this information to adjust the fuel delivery to the engine, ensuring that the vehicle runs smoothly and efficiently.
Why Is Pressure Sensor Important?
A fuel tank pressure sensor is an important component of a vehicle’s fuel system for several reasons. First, it ensures that the proper amount of fuel is delivered to the engine, which is crucial for ensuring that the vehicle runs smoothly and efficiently.
Second, it helps to prevent fuel leaks by detecting any changes in pressure inside the tank. This can help to prevent fuel from leaking out of the tank, which can be both dangerous and wasteful.
Finally, a fuel tank pressure sensor can also help to improve the overall fuel economy of a vehicle. By ensuring that the engine is receiving the proper amount of fuel, the vehicle can run more efficiently and use less fuel, which can save money on gas over time.
What Happens if Your Fuel Pressure Sensor Starts Malfunctioning?
If your fuel pressure sensor starts malfunctioning, it can have several negative effects on the performance of your vehicle. Here are a few of the most common issues that can occur:
Decreased Efficiency
If your fuel pressure sensor is malfunctioning, it may not be able to accurately measure the pressure inside the fuel tank. This can cause the engine to receive either too much or too little fuel, which can decrease the vehicle’s fuel efficiency and cause it to use more gas than normal.
Poor Engine Performance
A bad fuel pressure sensor can also cause poor engine performance. If the engine is not receiving the proper amount of fuel, it may not be able to perform at its best, which can result in issues such as misfires, stalls, and hesitation.
Hard Starting or No Starting
In some cases, inoperative fuel pressure sensor can cause the engine to have difficulty starting or not start at all. This is because the engine may not be receiving the proper amount of fuel to ignite and start.
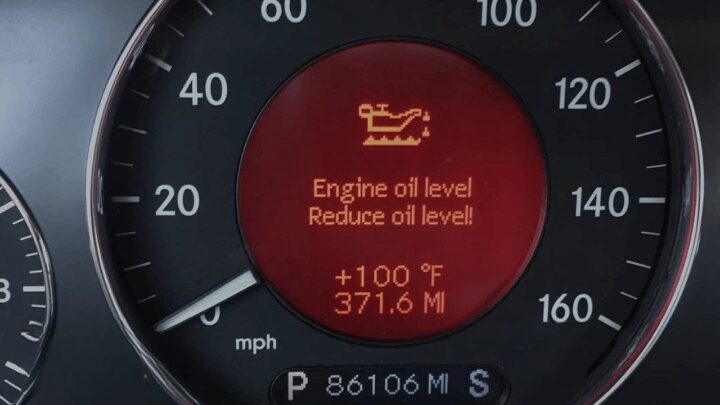
Check Engine Light
Finally, defective fuel pressure sensor can trigger the vehicle’s check engine light. This is because the engine control module (ECM) is receiving inaccurate information from the sensor and may not be able to properly regulate the fuel delivery to the engine.
What Should You Do if You Suspect Your Fuel Pressure Sensor is Malfunctioning?
If you suspect that your fuel pressure sensor is malfunctioning, the best course of action is to have it inspected by a professional mechanic. They will be able to diagnose the issue and determine if the sensor needs to be repaired or replaced.
Ignoring a malfunctioning fuel pressure sensor can lead to further damage to your vehicle and potentially costly repairs down the line. So, it’s important to address the issue as soon as possible.
Tools Needed for Testing a Fuel Pressure Sensor:
To test a fuel pressure sensor with a multimeter, you will need the following tools:
- Multimeter
- Fuel pressure gauge
- Jumper wires
- Safety glasses
- Gloves
What is a Multimeter?
A multimeter is an essential tool for any electrician, technician, or DIY enthusiast. It is a versatile device that is capable of measuring various electrical values such as voltage, current, resistance, and continuity. In this article, we will discuss what a multimeter is, how it works, and its different types.
A multimeter, also known as a VOM (Volt-Ohm-Milliammeter), is a device used to measure electrical values such as voltage, current, and resistance. It is an essential tool for anyone who works with electrical systems, from electricians to hobbyists.
How Does a Multimeter Work?
A multimeter works by measuring the electrical current flowing through a circuit. It has two probes, one positive and one negative, which are used to make contact with the circuit being measured. When the probes are in contact with the circuit, the multimeter measures the electrical current flowing through it and displays the value on its digital display.
Steps to test a fuel pressure sensor with a multimeter
Step 1: Prepare Your Vehicle
Before you begin testing your fuel pressure sensor, make sure that your vehicle is turned off and the keys are removed from the ignition. You should also ensure that the fuel pressure is at zero by using a fuel pressure gauge to release the fuel pressure from the system.
Step 2: Locate the Pressure Sensor
The fuel pressure sensor is usually located on the rail or the fuel line. Consult your vehicle owner’s manual to determine the location of the fuel pressure sensor.
Step 3: Remove the Fuel Pressure Sensor
Using a wrench or socket, remove the fuel pressure sensor from its mounting location. Be careful not to damage the sensor or its electrical connector.
Step 4: Connect the Multimeter
Using jumper wires, connect the multimeter to the fuel pressure sensor. Connect the red lead of the multimeter to the signal wire of the sensor, and the black lead of the multimeter to the ground wire of the sensor.
Step 5: Set the Multimeter
Set the multimeter to the voltage range that is appropriate for your sensor. Check your vehicle owner’s manual or the sensor’s datasheet to determine the appropriate voltage range.
Step 6: Test the Fuel Pressure Sensor
With the multimeter connected, turn the ignition key to the “on” position without starting the engine. The multimeter should display a voltage reading that corresponds to the fuel pressure in the system. If the voltage reading is not within the appropriate range, the fuel pressure sensor may be faulty and should be replaced.
Step 7: Reinstall the Fuel Pressure Sensor
If the fuel pressure sensor is functioning properly, reinstall it onto its mounting location using a wrench or socket. Be sure to tighten the sensor securely.
Guide to removing the Fuel Rail Pressure Sensor
Gather the Necessary Tools and Materials
Before starting the removal process, make sure you have all the necessary tools and materials. You’ll need a socket wrench, a socket that fits the sensor, safety glasses, and gloves. It’s also a good idea to have a clean cloth or rag on hand.
Locate the Fuel Rail Pressure Sensor
The fuel rail pressure sensor is typically located on the rail, which is the metal tubing that delivers fuel to the engine. Refer to your vehicle’s owner’s manual for specific instructions on locating the sensor.
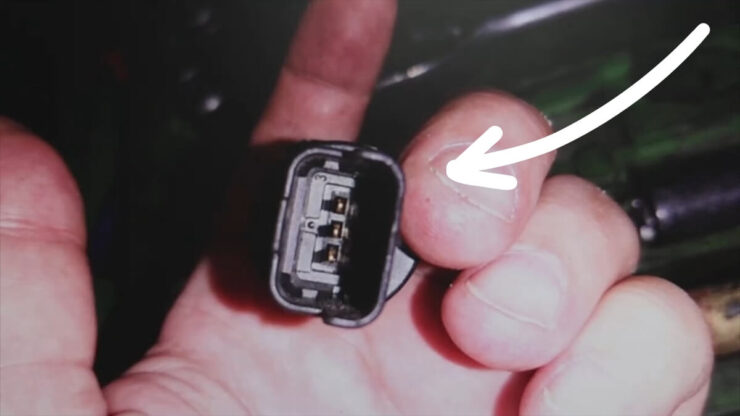
Disconnect the Electrical Connector
Before removing the sensor, you need to disconnect the electrical connector that connects it to the engine control module. To do this, press the tab on the connector and gently pull it away from the sensor.
Remove the Sensor
Using the socket wrench and the correct size socket, remove the sensor by turning it counterclockwise. It’s important to wear safety glasses and gloves during this step, as it may spill out during the process. Use the clean cloth or rag to wipe away any excess fuel.
Inspect the Sensor
Once the sensor is removed, inspect it for any damage or wear. If the sensor is dirty or clogged, it may need to be cleaned. If it’s damaged or worn, it will need to be replaced.
Install a New Sensor or Reinstall the Old One
If the sensor needs to be replaced, install a new one by following the steps in reverse order. If it just needs to be cleaned, use a clean cloth or rag to wipe away any debris and reinstall it. Be sure to tighten it securely with the socket wrench.
Reconnect the Electrical Connector
Finally, reconnect the electrical connector to the sensor by pressing it firmly into place until you hear a click.
FAQ

1.How to Test a 2-Wire, 3-Wire and 4-Wire Current Voltage Pressure Sensor with A Multimeter?
Testing a pressure sensor with a multimeter is a simple process that can help diagnose problems with the sensor or the system it is installed in. The testing process for a pressure sensor depends on its wiring configuration, which can be 2-wire, 3-wire, or 4-wire. Here are the steps to test each type of pressure sensor with a multimeter:
2-Wire Current Pressure Sensor
Disconnect the Sensor
The first step is to disconnect the sensor from the vehicle or system. This is important to prevent any interference with the readings or damage to the multimeter.
Set the Multimeter to Current Measurement
Mode Set the multimeter to the current measurement mode and ensure that it is capable of measuring the current range required for the sensor.
Connect the Multimeter to the Sensor
Connect the multimeter leads to the two pins of the sensor. Polarity does not matter in this case since it is a current sensor.
Apply Pressure
Apply pressure to the sensor using an appropriate tool, such as a vacuum or pressure pump. Check the multimeter reading to see if it matches the manufacturer’s specifications. If the reading is not within the range, then the sensor may be faulty.
2.How to Check a Pressure Sensor Before Installation?
Checking a pressure sensor before installation is important to ensure that it is working correctly and will not cause any problems in the system. Here are the steps to check a pressure sensor before installation:
Visual Inspection
The first step is to visually inspect the sensor for any signs of damage or defects. Check for any physical damage, cracks, or deformities in the sensor. Also, check the electrical connections for any signs of corrosion or damage.
Resistance Check
The second step is to perform a resistance check on the sensor. Set the multimeter to resistance measurement mode and touch the two leads of the multimeter to the two pins of the sensor. Check the resistance reading against the manufacturer’s specifications. If the reading is not within the range, then the sensor may be faulty.
Continuity Check
Perform a continuity check on the sensor by setting the multimeter to continuity mode. Touch the two leads of the multimeter to the two pins of the sensor. The multimeter should beep, indicating that there is continuity. If there is no beep, then the sensor may be faulty.
Output Check
Set the multimeter to voltage measurement mode and touch the positive lead of the multimeter to the output pin of the sensor and the negative lead to the ground. Apply pressure or vacuum to the sensor and check the voltage reading. The voltage should change with the pressure or vacuum applied. If there is no change in voltage, then the sensor may be faulty.
Calibration Check
Some pressure sensors require calibration before installation. Check the manufacturer’s instructions for calibration procedures and follow them carefully.
3.What Voltage Is Fuel Pressure Sensor?
The voltage of a fuel pressure sensor can vary depending on the specific sensor and its application. However, most fuel pressure sensors operate on a voltage range of 0 to 5 volts, with 0 volts representing low pressure and 5 volts representing high pressure.
This voltage range is typically used to transmit the sensor’s output signal to the vehicle’s engine control module (ECM) or fuel system control module (FSCM), which then uses this information to adjust the fuel pressure and optimize engine performance. It is important to refer to the specific sensor’s documentation or specifications to determine its voltage range and ensure proper testing and operation.
4. How Many OHMS Should a Fuel Level Sensor Have?
The resistance (ohms) of a fuel level sensor varies depending on the type of sensor and the fuel level in the tank. Typically, fuel level sensors have a resistance range of around 0 to 250 ohms, with 0 ohms representing an empty tank and 250 ohms representing a full tank.
However, the specific resistance values can vary depending on the sensor’s design and the vehicle’s fuel system. It is important to refer to the manufacturer’s specifications for the particular fuel level sensor to determine the resistance range and values for testing and operation.
Conclusion: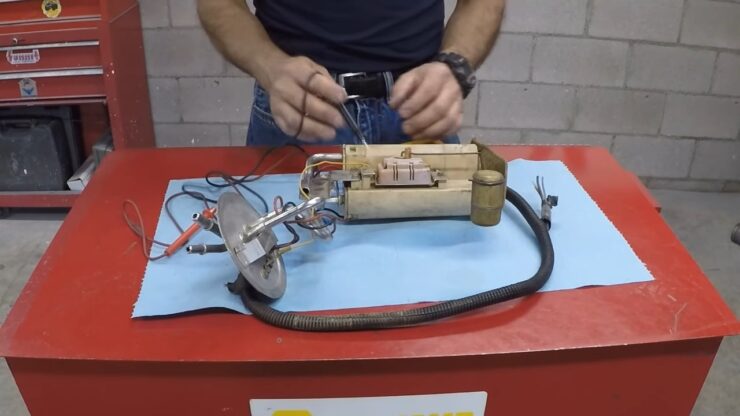
Testing a fuel pressure sensor with a multimeter is a simple and effective way to diagnose fuel system problems. By following these steps, you can determine whether your fuel pressure sensor is working properly and whether it needs to be replaced.
Remember to always wear safety glasses and gloves when working with fuel systems, and to consult your vehicle owner’s manual or a professional mechanic if you have any questions or concerns.
If you like this articel read more here about cost of changing transmission fluid.